☰
Adobe ToolsStelian Subotin • February 12, 2013 • 4 minutes READ
In this tutorial I will teach you the basics of the Photoshop Pen tool, which allows you to create your own, custom shapes. We’ll pass through the basics of the tool, and we will pass through a series of short and easy exercises so that you can get the hang of it in no time!
As you might, or might not be aware of, the Pen tool is one of the few shapes in Photoshop that work with Vector Graphics. These kind of graphics are way better then raster ones because when you’re vector graphics, you got no quality to lose when scaling,

This is the preview of the Pen Tool as found in the toolbox. The shortcut for the Pen Tool is the P key on your keyboard and as you can see, the dropdown shows other four “sub-tools” of the Pen Tool. We will move on explaining those right now:
Pen Tool: The Pen Tool allows you to create straight lined, smooth curved paths and shapes (vector).
With Postcards Email Builder you can create and edit email templates online without any coding skills! Includes more than 100 components to help you create custom emails templates faster than ever before.
Freeform Pen Tool: is a tool that allows you to easy draw vector shapes and various paths by automatically adding anchor points.
Add Anchor Point Tool: is a tool that adds anchors and reshapes actual shapes and paths (which are shape outlines).
Delete Anchor Point Tool: is very similar to the previous tool, the only difference being that this tool removes anchor points.
Convert Point Tool: this tool edits existing shape masks and paths by converting smooth anchor points to corner anchor points.
We will move on to some practice, that is why I’ll grab the Pen tool and will create a very simple shape. As you can see I created a triangle by placing 3 different anchor points, but to do that I have activated the default Photoshop grid (CTRL/Command + ;). The grid is extremely useful when working with Shape/Path tools such as the Pen tool because you have a clear representation of your workspace, divided into equal sections which comes really in-handy.

With Startup App and Slides App you can build unlimited websites using the online website editor which includes ready-made designed and coded elements, templates and themes.
I’ve used the Freeform Pen Tool to create a shape made up of squares as shown on the screenshot. The Freeform Pen Tool is slightly different than the Pen tool because it doesn’t allow you to manipulate that much with shapes and is limited to straight lines/squares.
As you can see the Freeform Pen Tool lets you create some more different kinds of shapes but keep in mind that there’s nothing creative or complex you can come up with by using this tool. I made up the “h” and “I” letters by using that tool, but keep in mind that there is nothing more you can do with it.
We will now move on to some Pen Tool practice. As you can see I have created a curved shape which is relatively easy to create. Grab the Pen tool and create an anchor point then create another anchor point and drag your mouse to the desired direction – that’s how you will achieve this effect.

Another “sub-tool” of the Pen Tool is the “Add/Delete Anchor Point” which might sound confusing but really aren’t. As you can see on the first screenshot I have created a very simple path. By using the Delete Anchor Point tool I simply clicked on the lower left anchor point and it got deleted – simple as that.
I have found this nice image of a green apple on flickr, so I thought that it might be useful and i could use it in a project of mine. I can’t use the image with the background that’s why I have to cut the apple from the composition.

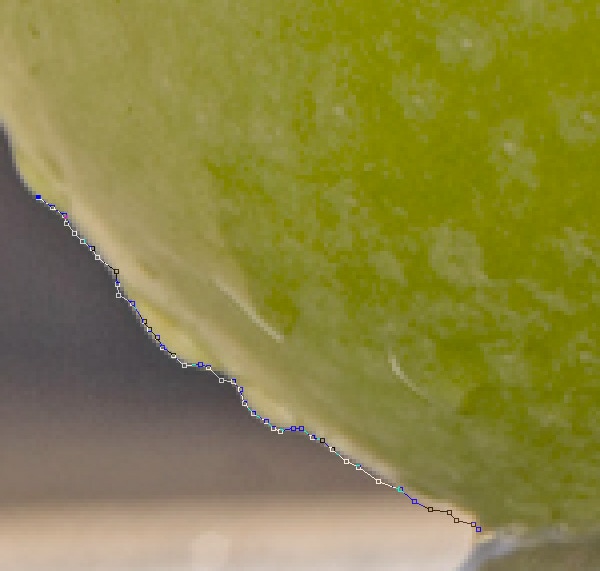
Grab the Pen tool, set the “path mode” to “Paths” and start passing around the apple shape. It’s very well simple and it’s much easier if you zoom in so that you can clearly see where you place your anchor points.

After you are done, just click do a right click on your mouse and choose “Create Vector Mask”. You can also go with “Define Custom Shape” but that way you will only get the shape of your object, not the “apple” itself. This technique is useful if you are thinking about creating shapes of peoples – vector silhouettes. Otherwise, just go with “Create Vector Mask” and your object will be “cut” from its previous document. Our result is not the most accurate but with some more practice and attention you can end up with a better result.
Stelian is a Web/UI Designer who focuses most of his time on writing and creating templates.
Designmodo Inc. 50 N 1st St, Brooklyn, NY 11249, United States
Copyright © 2010-2024
We create beautiful website and email builders, helping 30,000 customers to grow their business.
A simple tool to create emails and newsletters.
Create an animated website in minutes.
A perfect tool to create Bootstrap website.
Earn 25% commission on affiliate sales. We have everything you need to make money.
Our useful services seamlessly integrated with each other and our products to get you to the finish line faster.
Drag-n-drop solution for your static website to quickly host your static website.
Design in the cloud and create new websites seamlessly, without any coding skills.
Talk to your audience at scale. Send your email marketing campaign quickly and easily.
Get website downtime alerts by phone call, SMS, email, Slack, etc when your website went down.
Get started with the most advanced email builder for your next campaign or newsletter.
A perfect tool to create website or prototype projects. It will fit all kinds of projects.
Create an amazing static website in minutes and export ready-to-use template.
Get started with the most advanced email builder for your next campaign or newsletter.
A perfect tool to create website or prototype projects. It will fit all kinds of projects.
Create an amazing static website in minutes and export ready-to-use template.
Create an amazing static website in minutes and export ready-to-use template.
